A/B testing is an incredibly powerful tool. It’s a great way to test how changes in your app will affect your user’s behaviour without incurring a lot of risk. At Pelmorex Corp, in The Weather Network application, we use Firebase to help us perform A/B tests. If you’re new to Firebase and A/B testing, please check out this post here, written by a former Pelmorex Corp developer, Lydia Zhu: https://tech.pelmorex.com/2020/02/the-power-of-firebase-remote-config-a-b-testing/.
One of the limitations you’ll find when A/B testing using Firebase is the ability to run multiple tests simultaneously. Normally, it’s good practice to only run one test at a time. The reason being is that in Firebase, there’s no way, out of the box, to create mutually exclusive test groups. You may have the same users in multiple tests and that could muddy up some of your results. However, I’ve figured out an approach that lets you run multiple tests at once.
Running Multiple Tests
There’s a few ways you can probably come up with to be able to run multiple tests at once. Here’s what I’ve come up with to achieve this goal.
1 – Create New User Properties
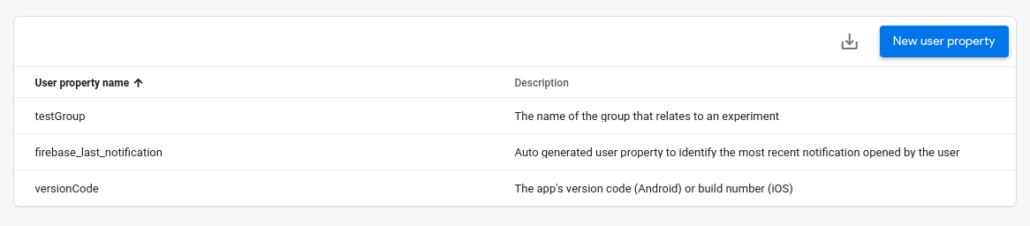
You need a way to create groups of users that can be targeted for a specified test. You also want to make sure that these different groups have approximately the same number of users. In order to do this, add 2 new User Properties in Firebase and name them testGroup and versionCode. From within the app, on every launch, set the Firebase User Property versionCode to the app’s current version code (Android) or build number (iOS). We’ll get back to testGroup shortly.
2 – Set Up Remote Config for Test Groups (part 1)
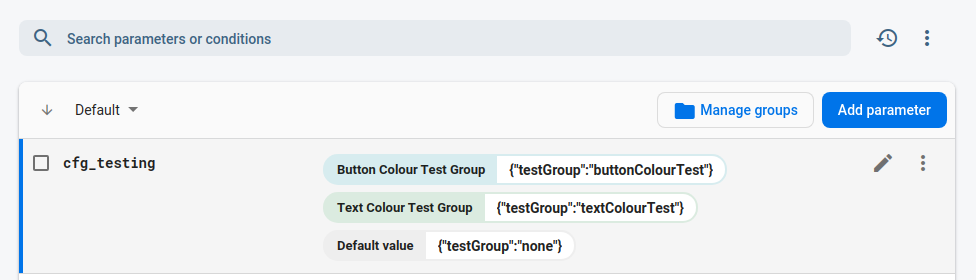
Next, in Firebase Remote Config, create a new parameter and name it cfg_testing. This can either be a string value or a JSON with 1 property. Let’s make it a JSON since it offers more flexibility if we want to add additional fields later. Your JSON will look like this: {“testGroup”:”none”}. Now, in the app, on every launch, set the testGroup User Property to the value fetched from the Remote Config’s cfg_testing.testGroup field.

3 – Add a Remote Config Condition for the First Test
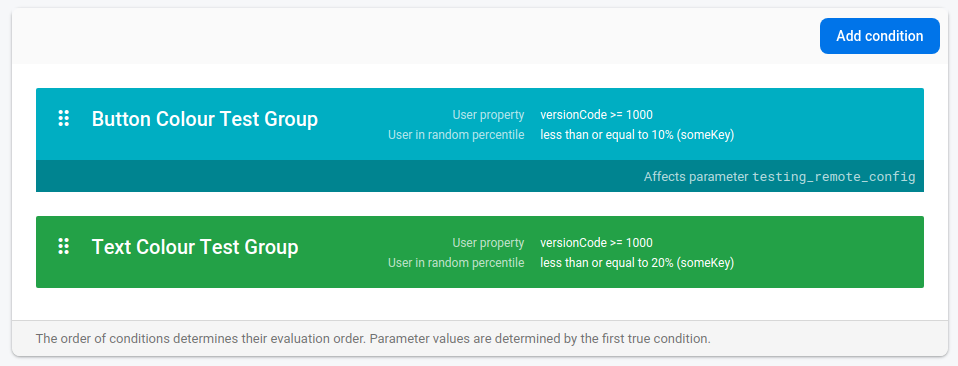
Up to this point, everyone’s testGroup user property will be set to “none”. You can make this default string whatever you want; “none” is what I went with. This is how we’ll identify users that are not in a test group. So how do we put users into a test group? That’s where the conditions come in! In Remote Config, under the Conditions tab, create a new condition. Typically, you’d start with the app id. Next, you can use the previously defined versionCode to ensure you are only targeting users that have a version of the app that has the changes you are testing. This will ensure that only relevant users will end up in your test. You can add versionCode >= [version code] as the next condition. Last, add a random percentile. Typically, we go with 10%, but this will depend on how many users your app has and how many you want in your test. For 10%, you can select <= 10%. Name the condition something relevant to the test (i.e. Button Colour Test Group if you’re testing click improvements based on the colour of a button).
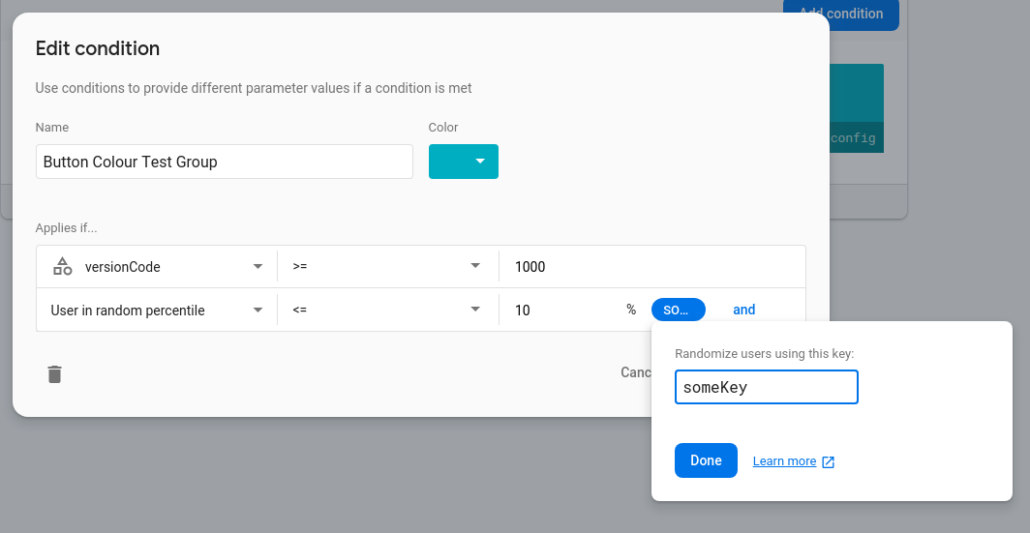
The way that random percentiles work is important to understand. Firebase automatically places users in a random percentile by randomly assigning them a fraction of a number (i.e. 5.333), while ensuring these numbers are distributed evenly across all users. When you select <= 10%, all the users that are assigned a number between 0 and 10 are selected. The <= 10% group always contains the same set of users. If you want to randomize the users to mix up the group, you can add a key (here I’ve called it someKey). Using the same key across conditions will ensure you’re targeting the same set of users.
4 – Add a Remote Config Condition for the Second Test
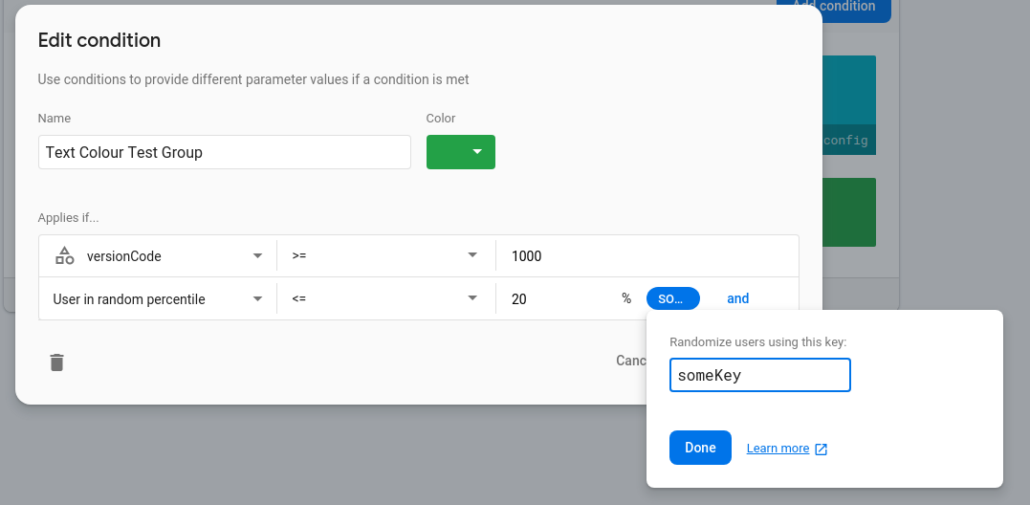
Follow the previous step, except instead of selecting <= 10% for the random percentile condition, select <= 20%. Make sure to use the same randomization key as before.
5 – Set Up Remote Config for Tests Groups (part 2)
Now that you have 2 conditions ready to go, it’s time to make use of them. Note: the order of the conditions in the Conditions tab is important. The group defined with <= 10% must be before the <= 20% group. Add the first condition to the cfg_testing parameter and set the testGroup field to something related to the test (i.e. buttonColour). Add the second condition and set that testGroup to something else. The conditions will be evaluated in order, so any users with an assigned percentile between 0 and 10 will fall into the first group. Any users between 10.001 (I’m not sure how many decimal places are used) and 20 will fall into the second test group. The reason the order is so important is, in this case, if the <= 20% condition was first, everyone between 0 and 20 would fall into it. No one would end up in the other test.
Don’t forget to publish your changes!
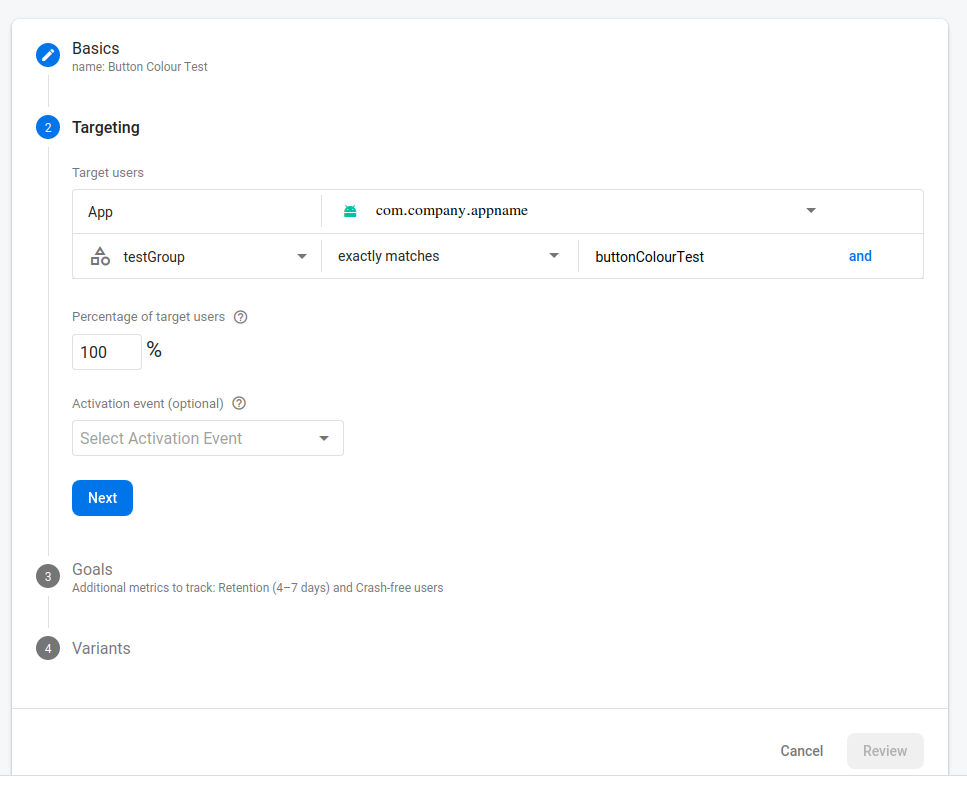
6 – Create the A/B Tests
We’re finally ready to add the A/B tests. When creating an A/B test, all you have to do now is target the correct testGroup User Property for each test. The app version and percentage of users has already been taken care of using Remote Config.
Happy A/B Testing!
